Welcome to part two on Spray Painting Furniture! If you missed Part One click HERE to have a read and see what you need to buy to begin your spray painting journey.
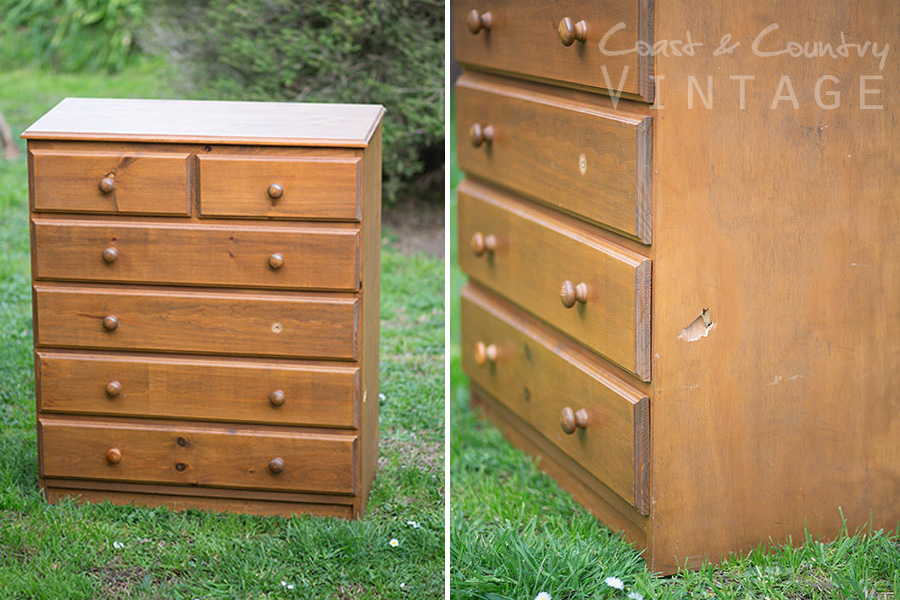
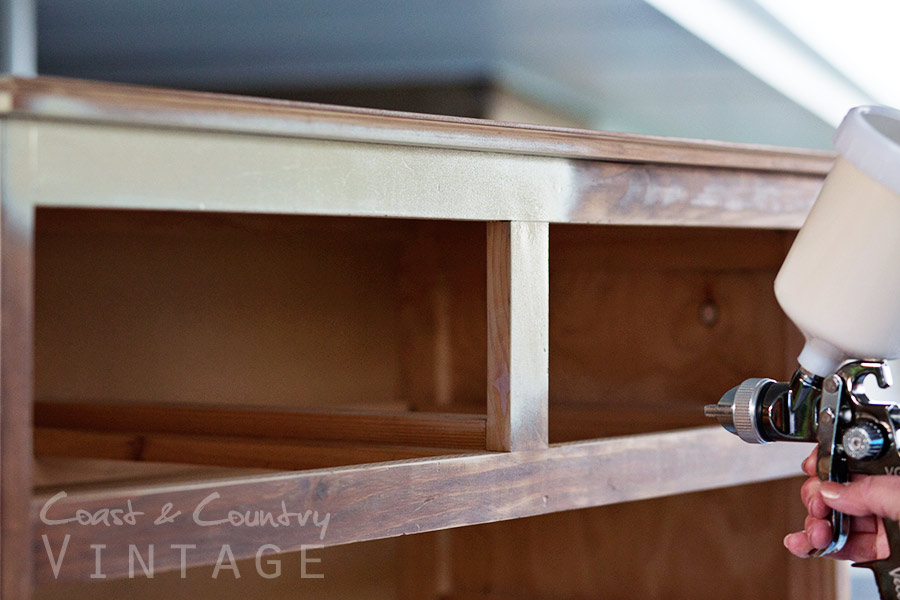
I chose this chest of drawers that found on the roadside to work on whilst chatting to you about spraying. It had a pretty significant hole in the side and a couple of the drawer bases were missing but both are easy fixes with a bit of patience and know how.
 Spray Painting can seem a little daunting at first and I’ll be honest, there can be a bit of patience required to begin with depending on which paint you choose to spray with.
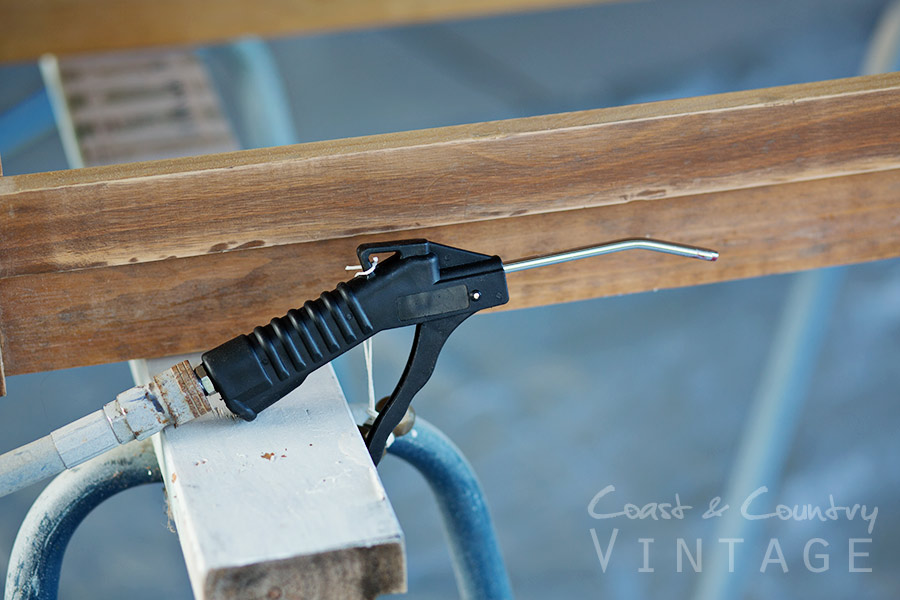
As with any type of furniture painting good prep is the key to a well painted piece that will go the distance so make sure you give your piece a good sand down with some 180 grit sandpaper to give it a little bit of ‘tooth’ and wash it down with a mix of 1 part Methylated Spirits to 10 parts water to clean off all the dust and grime. One of the handiest gadgets you can have when using a compressor is a simple ‘air blower’. Yes I’m sure it has a proper name but that’s what I call it so that’s what it is! It looks like this and it just blasts air when you squeeze the trigger…fast and easy to get dust out of all the nooks and crannies (pop a face mask on first!) and are great for blowing the dust bunnies out your computer too but I digress! They cost about $12. You can see mine is attached to the compressor hose here.
 Next you need to prepare your paint and this is where a little bit of patience comes in and a bit of trial and error.
Some paints are MUCH thicker than others and require some thinning down. How much can be a bit of a guess at first but the end result you want is paint that is the consistency of cream (not thickened cream, pouring cream).
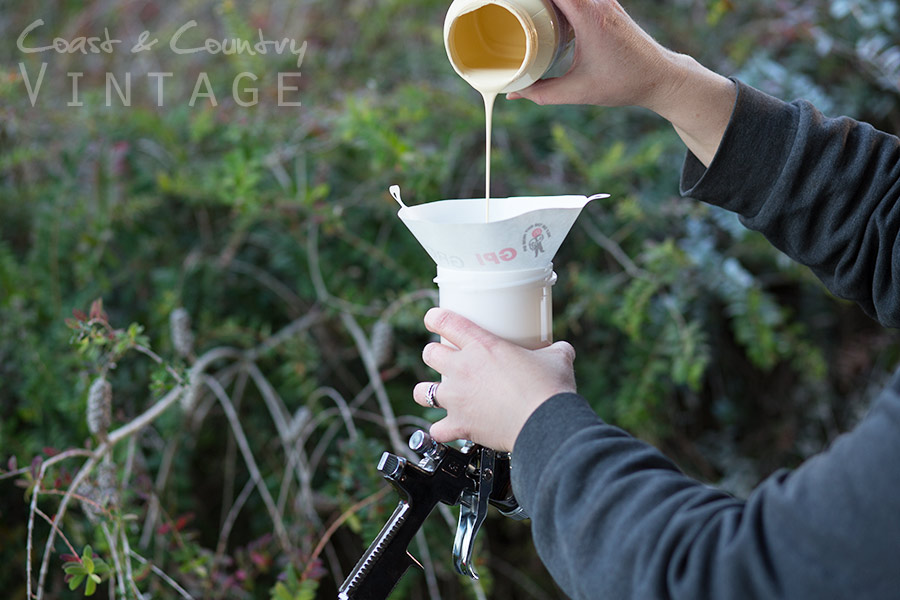
I always use a paint strainer when adding my paint to the paint pot, to catch any crusty bits from the paint can edge etc. The only exception to this is if I have opened a new can of paint. Paint strainers are available from the paint shops for around 50cents each and I am able to get three 0r four uses from each one if I rinse it and set to dry as soon as I’ve used it. You can also use old pantyhose but I find that messier.
Mix your paint well then pour it into the paint pot. It can be a worthwhile thing to grab yourself a spray gun stand when you purchase your spray gun or it can be a fine balancing act doing this bit). the exception is Fusion Mineral Paint pots which are light and easy to pour with one hand whilst holding the sprayer in the other.
 Screw the lid onto your paint pot and hold the trigger of your spray gun all the way in. Your gun is not yet attached to the compressor hose. The paint should dribble fairly freely from the nozzle. If it doesn’t even drip out slowly then your paint is too thick. Some spray units come with a special little measuring ‘dooverlackey’ that you can pop a bit of paint in and count how long it takes the paint to flow through so you know if it needs thinning but my patience doesn’t extend to that and I just want to get on with it! It may explain why it took me months to work out how much I needed to thin my paint and it’s still a bit trial and error on the day 😉 Like I said in part one…I’m no expert, but this is how I do it!
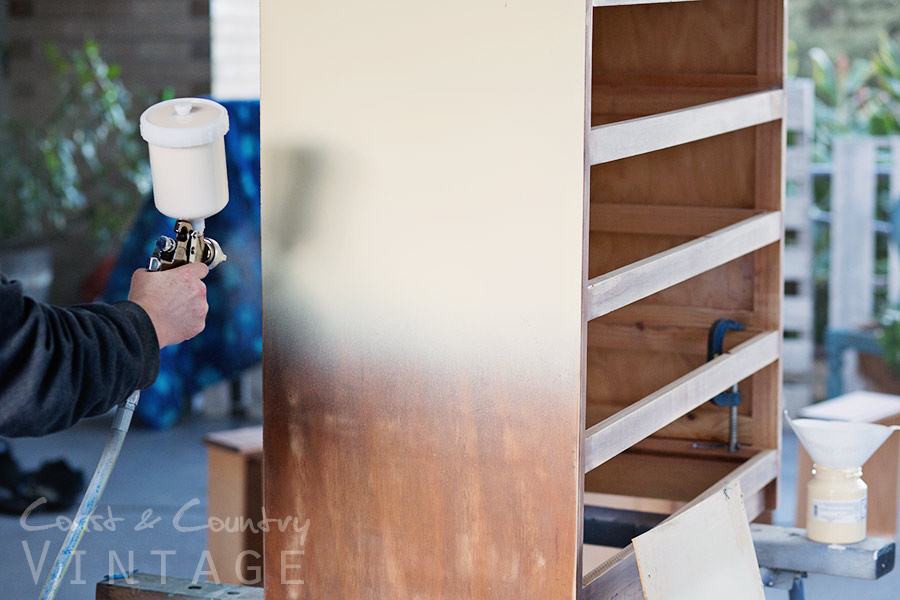
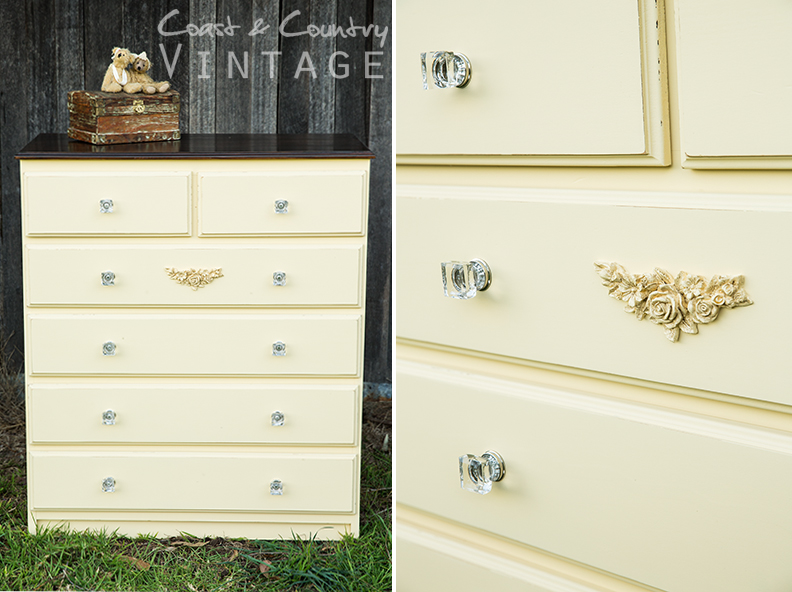
In my experience, the ONLY paint I have found so far that doesn’t need thinning at all for spray painting and can be used straight from the pot (hallelujah!) is Fusion Mineral Paint. Love it! And for this tutorial I am using exactly that, in the delectable lemony yellow colour ‘Buttermilk Cream’.
So far I have spray painted successfully with a variety of furniture paints including Annie Sloan Chalk Paint, Websters Chalk Paint Powder in a variety of paint brands and colours, Resene Lustacryl (semi-glosswater based enamel) and standard water based primers. In my experience ALL need thinning to be successfully sprayed as a fine furniture finish…some by up to 20-25%. I spent a lot of time and many hours of frustration trying to work out why my spray paint was coming out so painfully slowly. It was obvious to me that the paint was too thick but I had read in many paint blogs that thinning the paint more than 10-15% messes with the integrity of the paint.
In my frustration, I turned to seasoned furniture spray painter Paddy McCarthy from Furniture Transformations on the Gold Coast for help. He assured me that thinning the paint further was fine and that he often had to thin by up to 25%.
It would seem that thinning paint is not a bad thing to do as long as you use the correct product so as not to mess too much with the integrity of your paint. Water is not at all the best choice for thinning paint, rather my product of choice is Floetrol.
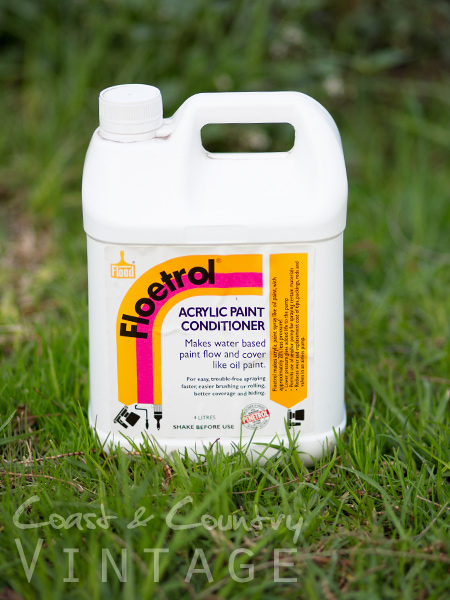
Floetrol is white but won’t alter the colour of your paint. It also has the added advantage of making your paint go further. Win! Since using Floetrol to thin my paint my spray painting experience has changed for the better. My spray comes out more evenly and more quickly making the whole process smoother and less frustrating. You can use Floetrol when hand painting to thin your paint a bit too if it’s too thick.
I try to begin spraying with a minimum of 250mls of paint in my pot. A gravity fed gun always performs better when full (500mls for mine) as the weight of the paint aids in the flow of the paint, but for your first few times I suggest sticking with 250mls.
My recommendation (unless using Fusion)…especially for the first few times, would be to measure out 200mls of paint and add that to your paint pot…then add 50mls of Floetrol (which would be 20% of 250mls). Put the lid on and give it a good shake. Pull your trigger in all the way and the paint should dribble out nicely. If it doesn’t then I would still suggest having a go at spraying before adding the extra 12-15 mls that would make the total of your thinner 25%
I would not recommend adding more than 25% Floetrol. If your paint is still too thick after thinning by 25% I would suggest it’s not suitable for spraying.
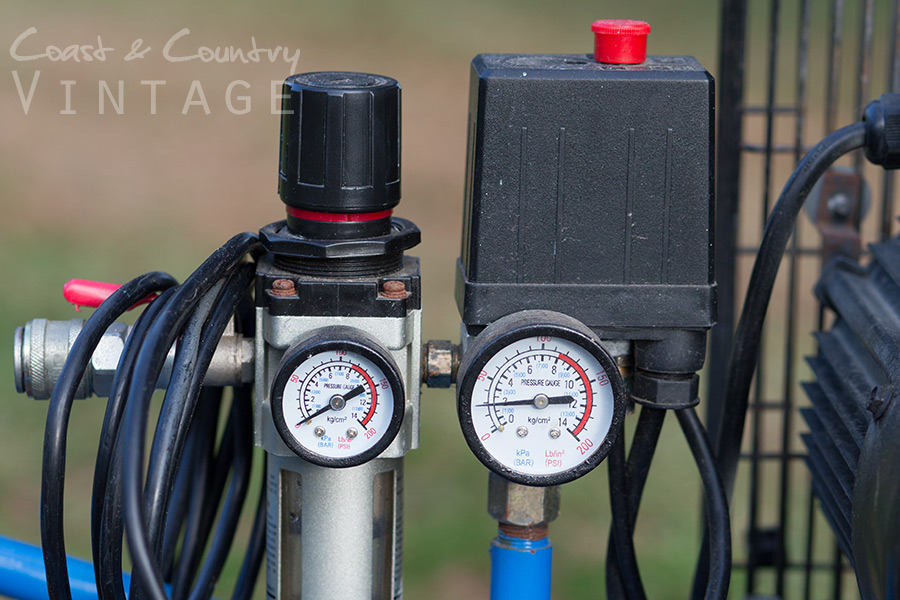
Connect your spray gun to the compressor hose and the hose to the compressor and plug your compressor in to the power. See that little red button there? Pull that up to turn the compressor on. The best amount of pressure to spray paint furniture with is around 45psi. See the black knob above the pressure gauge on the left? You need to turn that anti clockwise until the needle on the gauge rests on 45psi. Your compressor may turn on to fill the tank when you do this….and will probably make you jump! Whilst we are talking compressors…the chamber below the pressure gauge is a water trap. It need to have the water release after each spraying session or water will eventually spit out of your gun with teh paint. Ask the sales person where you buy your compressor to show you how to drain the water trap. It comes out fairly violently so be warned 😉
Guess what?
 You’re ready to spray paint! But wait….there’s more!
SAFETY FIRST!…please pop a disposable face mask on before you start. You *should* be using paints to spray with that are low VOC (volatile organic compounds) but whether you are or not, nothing should be inhaled into your lungs that is not pure air, and atomised paint is not pure air. You only need to look at the state of my glasses once I have finished spraying to know how much you’d be breathing without a mask! As a side note…if spraying polyurethanes consider purchasing a proper respirator mask as even the water based ones are not good to be breathing in.
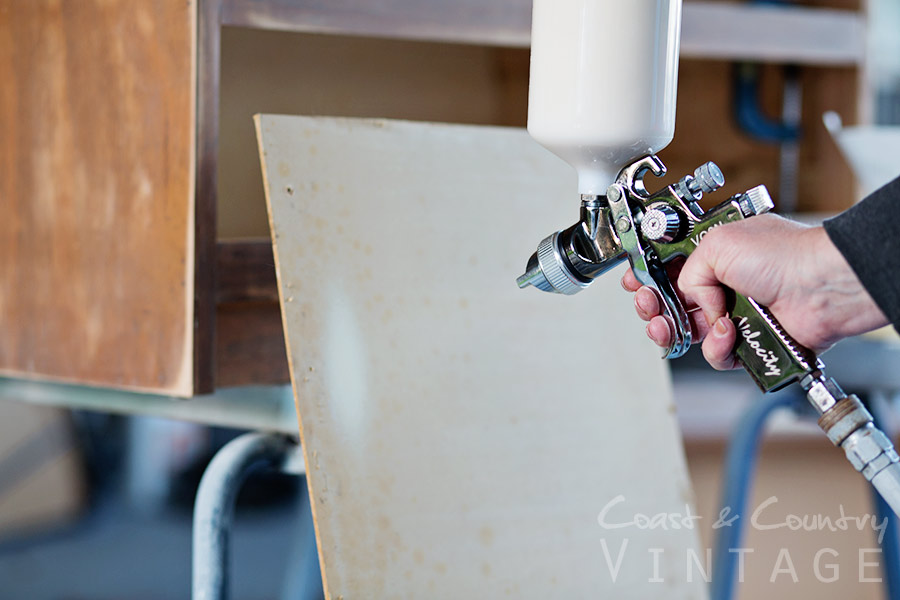
Find yourself a scrap piece of wood to do some practice runs on just to check your spray pattern. There are lots of Youtube videos that explain what each of the dials on your gun do but basically the dial on the side is your pattern dial. Wound all the way to the right it will give you a spot pattern (great for intricate areas). Turn it half a turn to the left and that’s my happy place. You’ll get a nice spray pattern around 4-6 inches high running North/South. You may need to play around a bit with your gun to work out where your ‘happy place’ is and yes you will waste a bit of paint when practicing.
The little dial on the very top at the back is the flow knob. Wind it in and less paint with flow into the nozzle …wind it out and more paint will flow in. When spraying very thin products like polyurethanes, I always have mine wound in a long way as it’s thin and comes out fast! Again practice before letting loose on your piece! I also wind it in a long way when using the spot spray pattern (the side dial all the way to the right) as the paint flow is more concentrated in the spot pattern so comes out faster.
The correct method to spray paint is to begin and end each sweep off the object you are spraying. Get your movement happening then as you come to the surface you are spraying squeeze the trigger in. Don’t release it until you are off the edge at the other end. Spray painting technique is probably something that needs to be shown in a video….and one day I may get to it, but in the meantime just search on Youtube and you’ll quickly find one that explains exactly what I probably explained poorly!
 Once you have your action down pat, start on your piece. Don’t go for full coverage in one coat or you’ll most likely get drips. Multiple thin coats are the best way to spray paint. To avoid stripes and get an even coverage, you should aim to overlap each run by at least 1/3rd.
Something to watch out for when spraying chalk style paints is build up at the nozzle. It tends to crust over and all of a sudden you’ll notice that you’re spray has slowed down or even stopped. Just flick the crusty bit off with your fingernail and you’ll be good to go once again!
Use the fan spray to do the large spans of your piece….then dial to the spot spray, wind in your flow knob and paint the smaller areas. If you do this correctly you shouldn’t have to mask your piece to prevent it from getting covered in over spray as your spray should be very controlled.

 Between coats, wrap the nozzle of your spray gun in glad wrap and when ready to begin again be sure to pick the crusty bit off the end of the nozzle. I have left my gun loaded with paint overnight without any detriment, but if I knew I wasn’t going to get back to my project for 48 hours I would empty my paint into a jar and wash my spray gun.
Wash it outdoors with a hose. Remove the paint pot and lid and rinse with the hose. Remove the nozzle from the front of the gun, the flow knob and spring (be careful not to lose the spring!), and the paint needle and clean thoroughly with water. The nozzle area can be a bit of a bear to get clean but just be patient and continue to squirt water through it from the place the pot screws on with your hose until it runs clear.
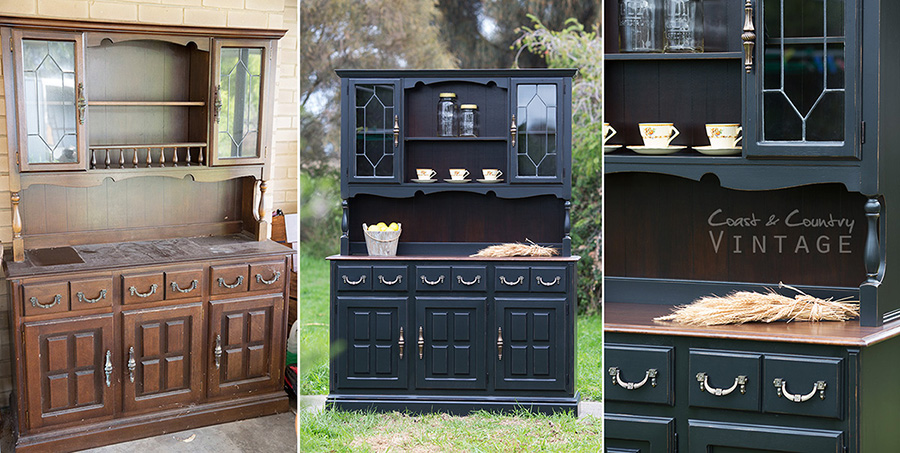
The finished piece. All spiffy and ready for a new home! The finish you’ll get when spraying with a HVLP gun as opposed to the electric variety you buy in the hardware store is testament unto it’s own. Run your hand across the finished paint job and it’s flat and smooth…no bumpy orange skin like the electric sprayers will give.
 Spray Painting gives you great coverage and using a gravity fed gun is very economical. When your paint pot is empty it can look like there’s a lot of paint clinging to the sides of the pot, but if you swish a paint brush around it you’d be lucky to fill a brush, so really no more waste than rinsing a brush. The time that spray painting takes as compared to hand painting makes a few little cons just so worth it. I love hand painting and find it very relaxing, but I also own a business which relies on moving furniture through quickly. So I tend to hand paint about one in every five pieces (usually small ones!)
I hope I have helped to demystify spray painting for some of you and inspired you to have a go! If you want to keep it as simple as possible I suggest starting with Fusion Mineral Paint…it’s literally just open the pot, pour into the sprayer and go! The first time you spray paint chairs with spindles…you’ll be sold!
Feel free to comment below if you have any questions and I’ll do my best to answer them! I’d love you to leave a comment anyway as I LOVE to hear from my readers! 🙂
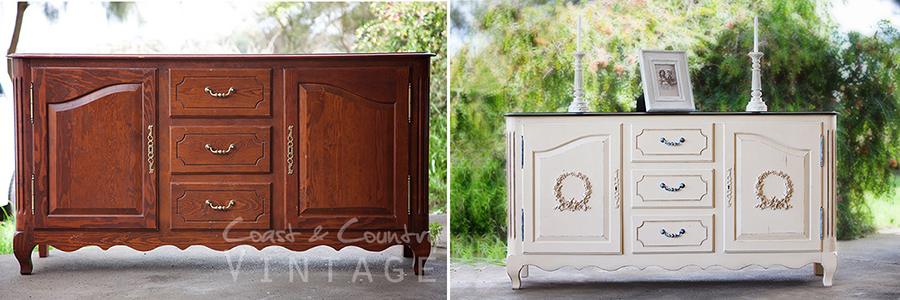
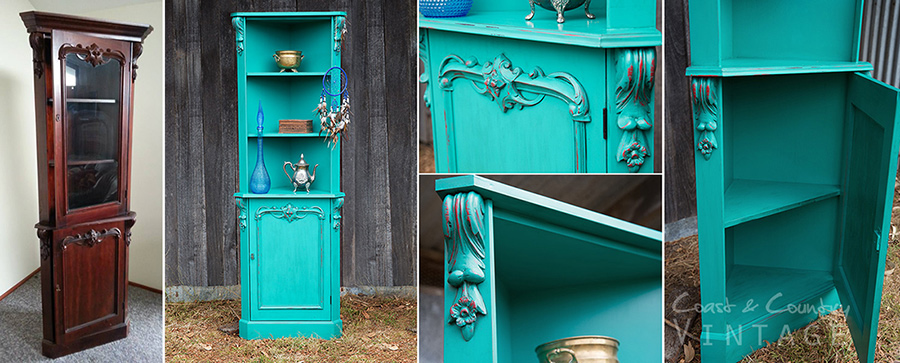
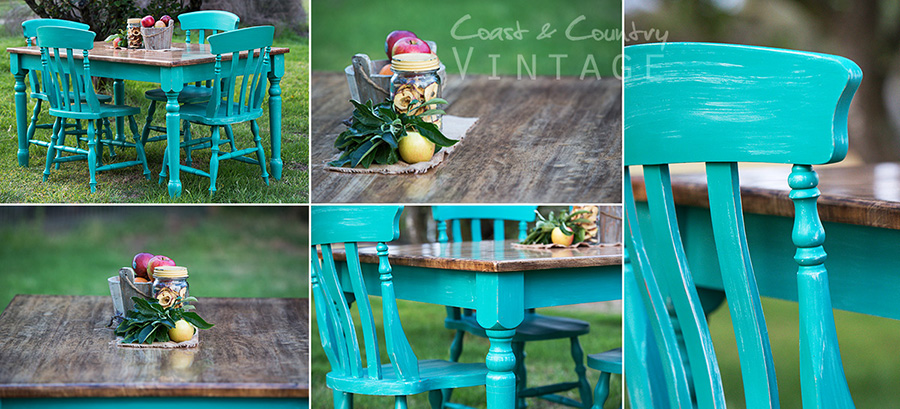
Here are a few other pieces I have spray painted….
Love it. What a great explanation. Thanks so much Hayley.
Hi,
I have just read Part 1 & Part 2 of Spray Painting Furniture, thank you so much! Very imformative, thanks for taking the time to share all of that, I found it very helpful. I have tried an electric sprayer and was not impressed. I really would love to invest in a compressor so will have to keep an eye out for a ”special”!!