
Part One. Choosing the right equipment
I get a few emails each month from people asking about spray painting furniture with Chalk Paint so I decided to answer the most common questions in a blog post. It’s a big one so grab a coffee 🙂
May I just say, I’m NO expert! I can only share my own experience and like any other form of painting it’s a constant learning experience.
The most common question is almost always about the cost. Is it pricey to set yourself up with the right equipment to spray paint? The short answer is yes…it is. So you need to weigh it all up with how much furniture you paint, whether you paint to sell, space limitations and how long it will take you to re-coup your investment. And yes it is an investment.
There’s a bit of reading here before I get to the nitty gritty & photos….but I think it’s valuable background information so do read on. 🙂
I first decided to try spray painting after hand painting a six seater dining table and chairs. Anyone who has hand painted a dining table and chairs will know exactly where I’m coming from already!
The six chairs had a ton of spindles (ugh!). They were your typical orange pine and after lightly sanding each chair I needed three coats of paint per chair for full opaque coverage, 45 minutes per coat per chair…..THEN I hand waxed each of them with two coats of wax. Let’s just say I never wanted to paint another chair again by the time I was done! (and boy was I DONE!)
This was our own dining setting and so a labour of love. Had I been selling it I would have been working for $1 an hour! (maybe less……)
So after resolving that there would be no more dining settings in my near future, one just happened my way…..a very short time later.
No way was I hand painting another one, so I marched myself to Bunnings and came home with a lovely bright yellow Wagner electric spray gun.
I decided to test it out on a small desk I had before embarking on the bigger table & chairs project (plus I was still having ‘spindle nightmares’ at that stage…too soon, too SOON!)
I don’t have any photos of that experiment…but within 24 hrs I had returned the gun to the store for a refund.
Did it spray paint? Yes. Did it spray paint well? Yes…..and no.
Firstly it used a TON of paint. I was unable to dial the flow down to a fine enough spray pattern to avoid wasting paint. I had to cover up the drawer recesses and cupboard interiors with tape and newspaper to stop them getting paint all over them (took me 45 mins) Secondly it resulted in a rough ‘orange skin’ finish. This is one area when using a spray gun and compressor set up makes all the difference and ultimately the beautiful smooth finish is one of the main reasons we decide to spray paint in the first place (as well as time saving of course). I tried watering the paint down but by the time it was thin enough to come out in a finer spray it was too thin and I ended up with paint runs. And lastly, the gun unit somehow ended up with paint in recessed area near the motor (it fell over once or twice when resting on the ground)…and there was no allowance to open the area to clean it out making it dangerous. I may have just been unlucky of course. In my opinion, these guns are great for what most people would purchase them for….spray painting a fence or outdoor setting maybe. But for fine furniture refinishing where a smooth even finish is desirable, this one didn’t cut the mustard. I was a bit deflated.
My hubby had an old small compressor in the shed and suggested I buy a spray gun to try with that, so that was the next step. I purchased a spray gun & pot and connected it up to the compressor. I decided to jump straight in and paint the chairs (because it was do or die and I was NOT hand painting them!) I was painting with Annie Sloan ‘Florence’.
Within minutes I could see it was going to be a success! The paint did come out slower than I would have liked (which I later learned was because it was too thick) but within 20 minutes I had sprayed a good coverage coat of paint on the first chair (easily the equivalent of two coats coverage if I’d done it by hand). The coverage was nice and fine and dried completely smooth. I was impressed. You may be wondering why it took a whole 20 minutes at this point. Apart from my paint being too thick (more about that later) these little compressors are the entry level domestic ones you see in the lead up to Father’s Day for between $99 – $200 They look something like this.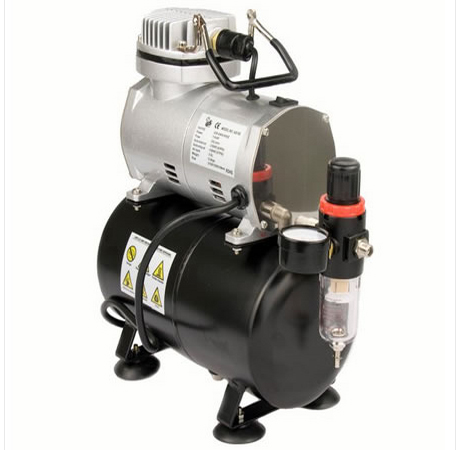
They have a small tank capacity (anywhere from 8-21 litres), a small motor (750 watt-1500 watt) & a low pressure capacity. They are fine for using small air tools like brad nail guns and pumping up tyres but are made to a budget and not designed for constant heavy use.
Our little unit couldn’t keep up and I had to keep stopping to wait for the air tank to fill. The paint also started spitting a bit each time the pressure dropped as the tank emptied. It meant that the compressor was pretty much constantly filling and therefore working very hard. I was thankful we live on a farm and we have no neighbours close by! Compressors are LOUD!
The compressor got very hot over the next 45 minutes and I had to give it an hours break to cool down. By the time I’d finished a coat on all six chairs it was dead as a doorknob (as in smoking dead). Bare in mind that this wasn’t a new compressor….but it served it’s purpose in convincing me that I needed a BIG compressor if I was seriously going to spray paint.
Around the same time, my daughter was looking into spray painting her car. (she’s working with her dad to restore her ’61 Morris Minor) so we made the decision to go halvies in a nice big compressor. After researching for a few days, we went shopping and came home with this baby……
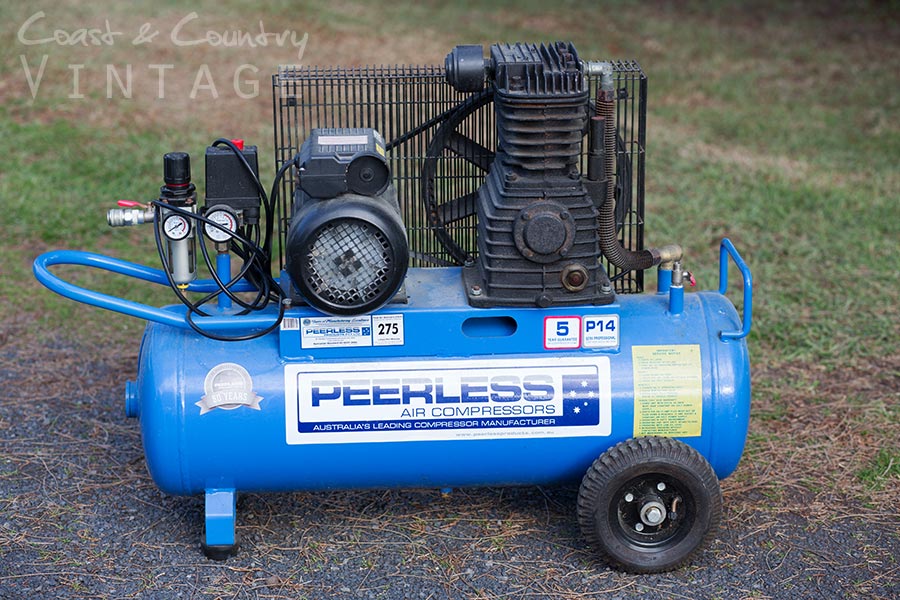 It has a nice big 2.75 HP belt driven motor, a 55 litre tank capacity and a maximum air delivery of 100 psi (pounds per square inch). It’s very heavy at a whopping 78kg but with a long hose there is very little necessity to move it so it’s not an issue to me. Whilst a belt driven unit is not a necessity, it’s helpful for extended uses like spray painting.It set us back around $1K
Whilst we needed to buy the biggest compressor we could manage there are some cheaper options out there if you shop around…like the Stanley Belt Driven 2.5HP unit from Super Cheap Auto which can be picked upon sale for around $800.You *could* get by with a smaller, cheaper compressor, but bare in mind that the smaller the tank capacity, the more the engine is running, the quicker it will wear out and the more your neighbours will hate you! When painting a big piece, I find even my big compressor is running fairly constantly, but it’s powerful enough that I never need to stop spraying whilst it re-fills.Win!
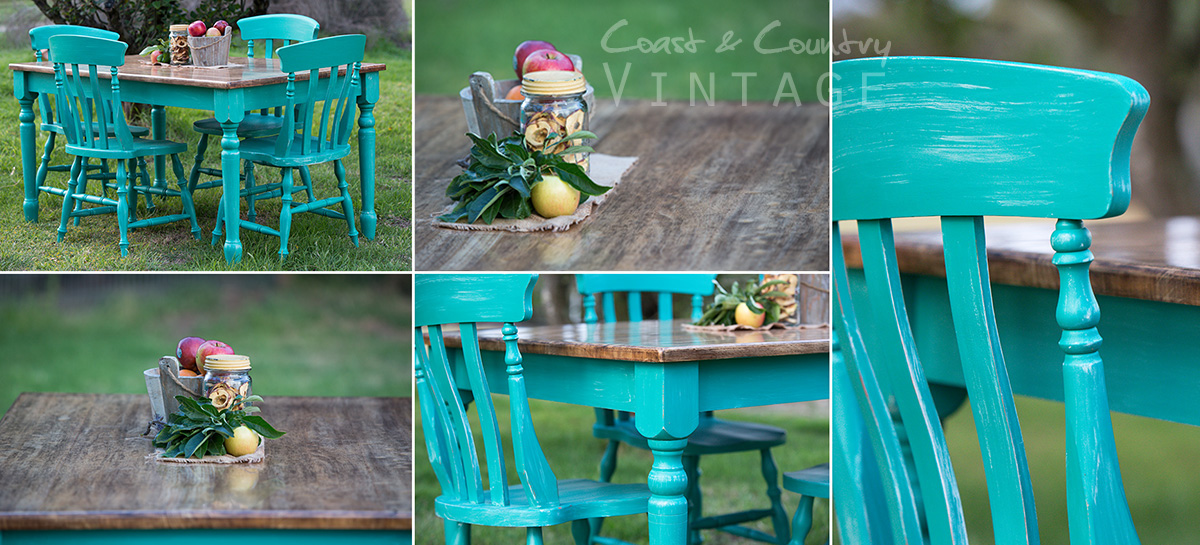
Incidentally…here’s the first dining setting I spray painted that cemented the need for a sprayer to me. The white was dry brushed on by hand.
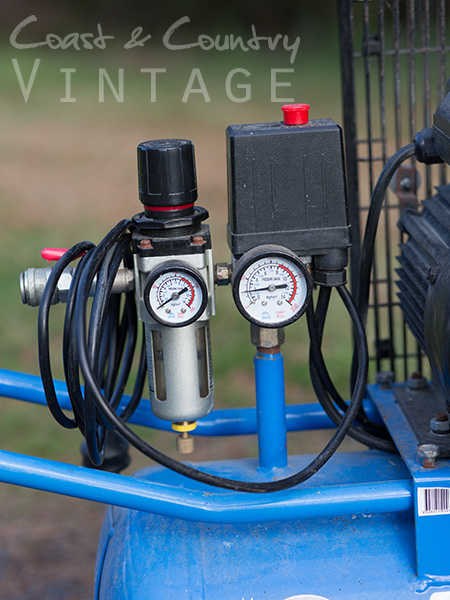
 Just as an extra note…Most compressors these days come with a pressure gauge and a water trap (which needs to be emptied periodically during a big spraying day and when you are finished for the day). If your compressor doesn’t have a pressure gauge you’ll need to purchase one and it will go between your hose and your gun. These add more bulk and are awkward so it’s a good thing to consider when looking at compressors.
Here’s what one looks like when attached to your gun.
You can see the pressure gauge on my compressor on the left there. The gauge on the right can essentially be ignored. Incidentally the best psi to spray paint at is around 45psi.
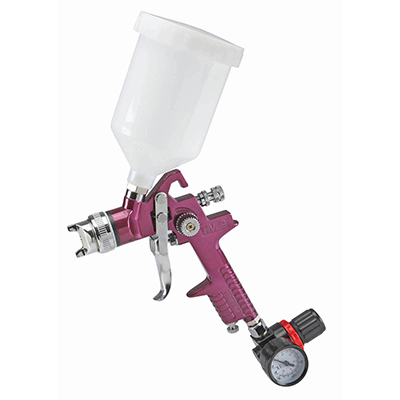
 Next on your shopping list is the spray unit itself. I use a HVLP (high volume low pressure) spray gun unit. I started off with a cheap Black Ridge gun from Super Cheap Auto and it lasted me well over a year. Spray gun prices range from $50 – $200 but the cheaper ones are fine for someone just starting out. I think my Black Ridge was about $70-80. I have only recently upgraded to this gun here and although it is better, I was content with my Black Ridge for that first while too. Make sure you buy a gun with a tip size of 1.4 mm minimum. My new ‘Velocity’ gun is pictured here with a disposable paint strainer (which is also a necessity but more about that later).
 Some spray guns have the paint pot under the gun and others like mine are gravity fed. It’s personal preference. I feel the gravity fed guns are more economical as you use every scrap of paint whereas the other guns operate on a suction system. I also feel the gravity fed guns are easy to hold and negotiate around shelving etc but again it’s personal preference and one is not necessarily *better* than he other, just different.
Next you’ll need a good length of hose. The smaller cheaper compressors come with a curly spring type hose that stretches to about 8 feet but the serious sized compressors don’t. I chose to buy a 50 metre hose, which sometimes I hate (like when I am coiling it up at the end of the day) and sometimes I am forever grateful for (like when I can take my gun and hose around the other side of the house without having to drag 78kg’s of compressor with me!) So think about where you’ll use your compressor and how far you may want your hose to reach. My 50 metre hose was about $55
You’ll also need to purchase connectors for each end of the hose. The one inset on the left attaches the hose to your spray gun and the one on the right to the compressor. They are only about $5-6 each from memory.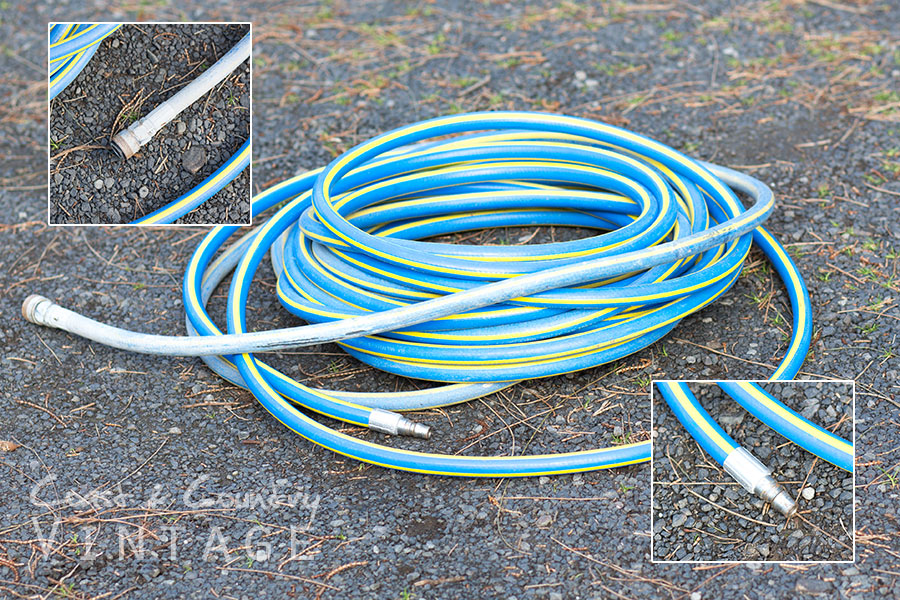
Once you have all the gear you are set to go! Whilst spray painting is fairly straight forward….there are some tips and tricks that can be useful to know! But right now, the spring sun is shining and I’m off outside to spray paint whilst it’s nice!
Stay tuned for Part Two: Spray Painting Furniture
Hayley, You are the GUN for taking the time to explain all this! Thanks so much.
[…] to part two on Spray Painting Furniture! If you missed Part One click HERE to have a read and see what you need to buy to begin your spray painting journey. I picked this […]