I love it when people think of me when they have a piece of furniture they no longer want. I see too many lovely pieces sitting on nature strips waiting for hard rubbish collection…such wastage in an era where we try to promote recycling! We just keep throwing the good stuff away and trucking the new stuff in from China to replace it!
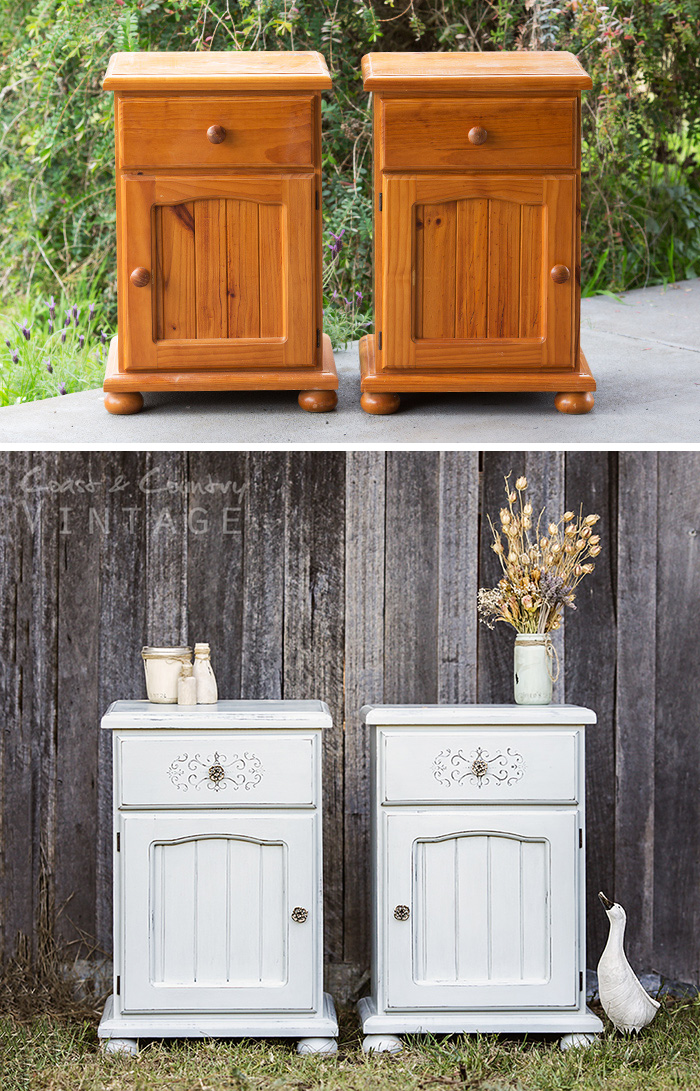
The older furniture is made so well…made to last…so don’t walk by a great piece of furniture just because it’s pine that’s gone orange. It’s just the varnish that’s discoloured and we all know that beauty is only skin deep right?
After a recent visit to my cousin Andy’s house, I came home with my station wagon fully loaded to the roof! One of the things she passed on to me was this orange pine set of bedsides. There were some amusing stories attached to them as each family member that moved out of home had used them for a time and ultimately they’d ended up back where they began.
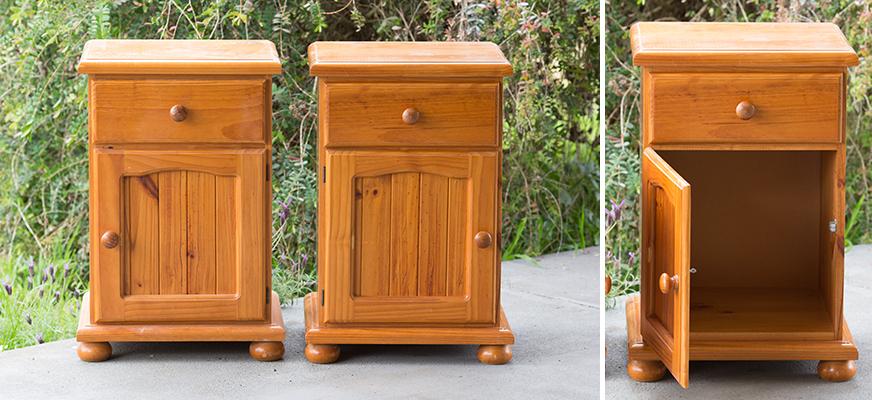
They were made really well with neat dovetails joins…the most impractical part was the cupboard space….it really needed a shelf to make it more usable. Lucky for me I have a very handy hubby and a stash of old furniture pieces I have salvaged for a rainy day (as you do 😉 ) and in said stash I found two pieces of shelving that were just the right thickness. Win!
I try to be as independent as I can when doing up old furniture and part of that is doing my best to learn new skills. Adding a shelf is something I’ve needed to do more than once so I asked hubby to help and teach me at the same time. After helping me measure, cut and fit the first shelf, I managed to do a great job of the second shelf all by myself. I love that my wood working skills are advancing all the time and I am slowly acquiring my own set of basic power tools. 🙂 On examining the receipts in my purse you’d be hard pushed to find one for clothes or shoes….they are all hardware store receipts! I’m sure many of you can relate!
There are SO many different ways I could have refinished this pair of bedsides….but I wanted to do something a bit different from my normal ‘pretty but safe’ style.
I wanted RUSTIC for this pair…so the obvious choice of paint was Milk Paint.
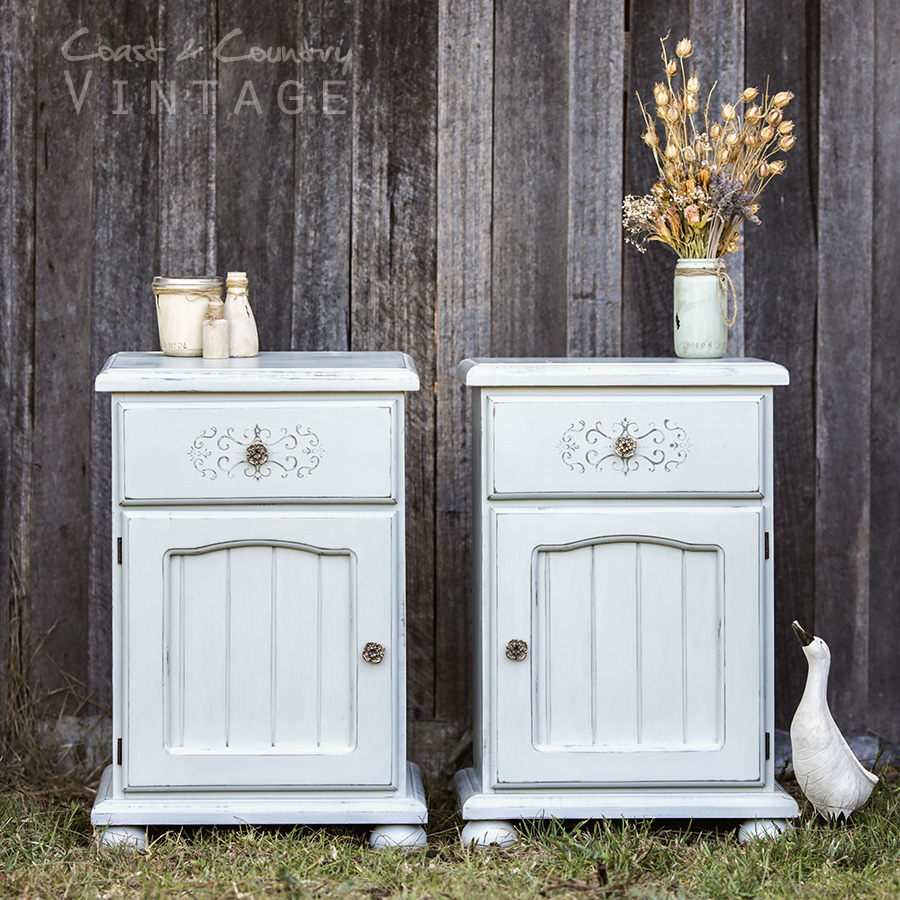
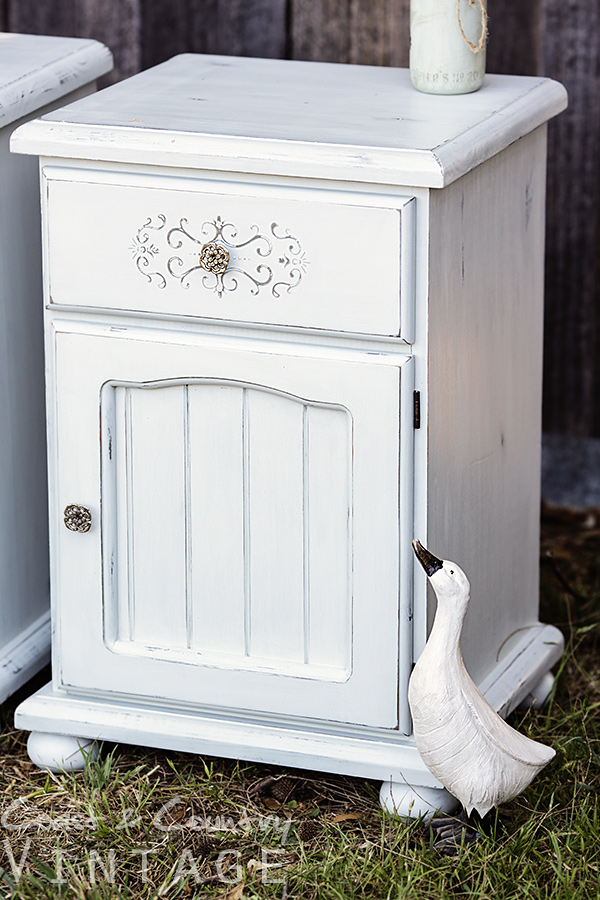
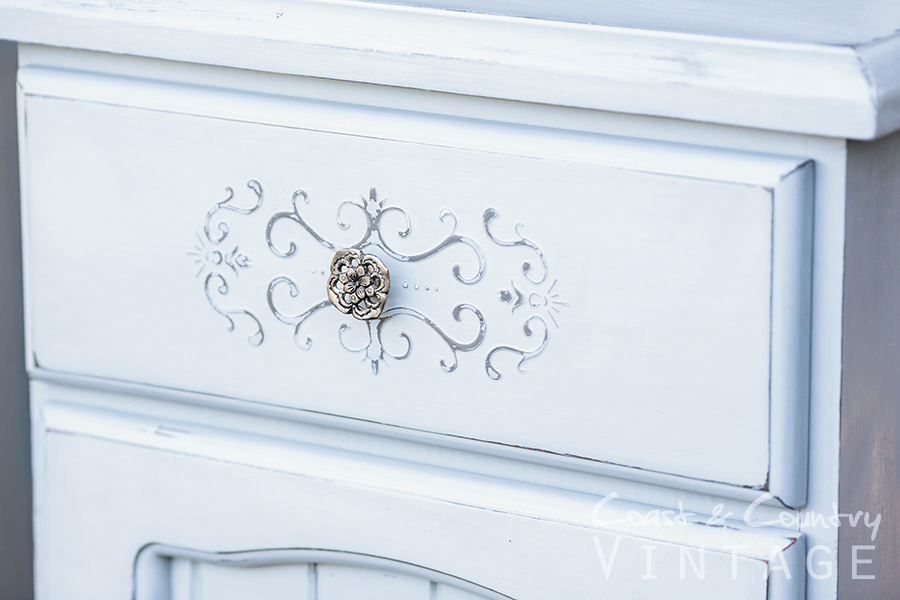
I removed all the hardware and sanded the piece with 180 grit sandpaper to roughen up the varnish a little and cleaned off all the dust and grime. First the shelf was added to each piece and then I created a raised stencil across the drawer front to add some extra interest. I have a little tutorial in the works for how to do the raised stencils but if you are impatient and would like to give it a try please feel free to message me and I’ll walk you through it. The raised part is achieved by using Fusion Sandstone Texture to create the stencil pattern instead of paint. When it’s dry it can be sanded and painted. I did mine straight on the pine then painted over it.
I began with a coat of Miss Mustard Seed’s Milk Paint ‘Trophy’ which is a slate grey colour. I used Bonding Agent in my Milk Paint as I didn’t want this colour to chip. I don’t usually take photos whilst I’m painting as I am such a messy painter I get paint everywhere…so my camera stays away.
But I pulled out my phone to snap this shot just as I started as I wanted to show you one of my new amazing new Cling On! brushes. I’d heard rave reviews about these beautifully soft synthetic brushes from American forums and couldn’t wait to get my hands on one to try. I bought three and was totally sold in the first five minutes. They are super comfy to use, reduce brush marks like you wouldn’t believe and rinse clean in water without any hard yakka. In fact with chalk paint you can just give them a quick rinse to get the excess paint off then pop them in a container with just the bristles in water and they self clean. How good is that? I was so impressed I became not only a stockist of these wonderful brushes….but an Australia Distributor for them! They come from Holland and are just beautiful to use. They are available in round, flat and oval head and in multiple sizes. There’s even a bent one for hard to reach areas! I’ve used the bent one three times in the last week alone.
If you’d like to try one for yourself you’ll find them here. If you are a paint stockist and would like to retail these brushes send me an email. 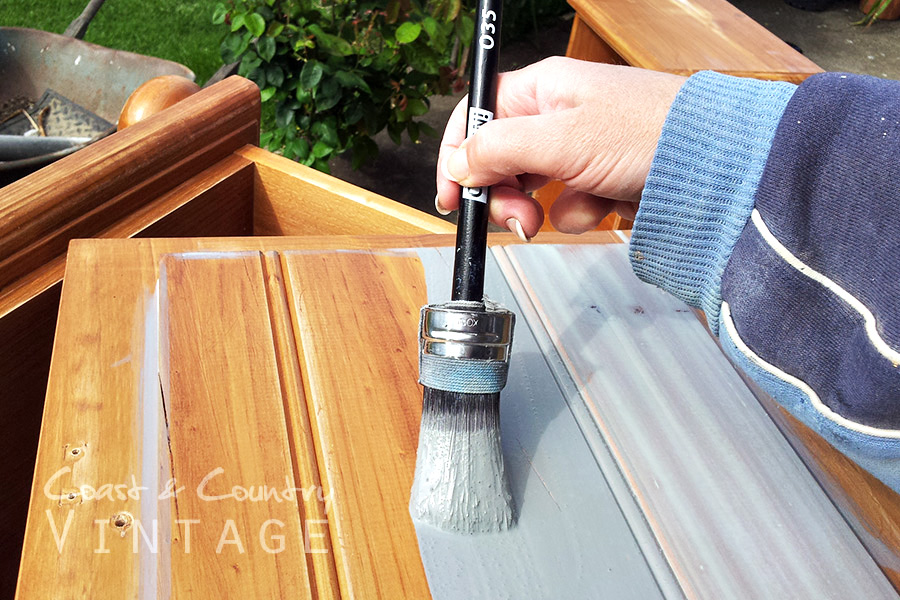
That IS Trophy that I’m painting with in the photo above….the sunlight has just washed out the colour a bit and it goes a lot darker as it dries. Once the Trophy was dry, I painted two coats of MMSMP ‘Mora’ which is one of the new European colours and a lovely soft grey. I used a damp cloth to rub away some of the Mora in places to reveal the Trophy underneath, paying particular attention to the raised stencil area to create definition.
Two coats of Miss Mustard Seed’s clear Furniture Wax and two new knobs and this makeover has become on of my favourites to date! I so need to do more RUSTIC pieces!
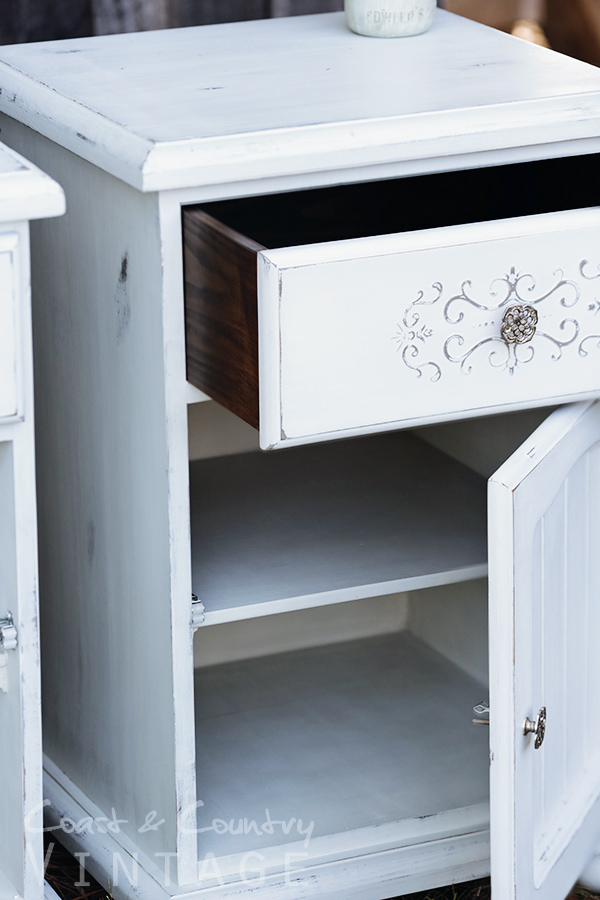
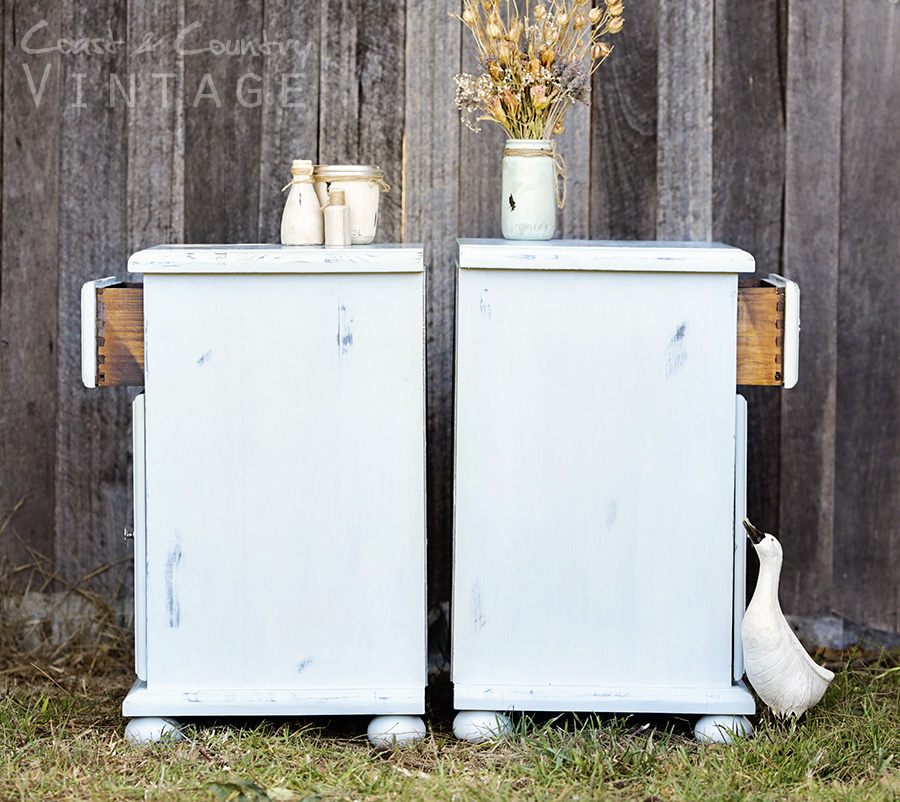 I stained over the orange draw sides and interior of the drawers with some dark walnut gel stain and then sealed it with a single coat of Miss Mustard Seed’s Tough Coat. Top Tip: Applying Tough Coat with a damp chux cloth eliminates brush marks and makes it easier to get into the corners.
 Coast & Country Vintage has Miss Mustard Seed’s Milk Paint and products available online and posts Australia wide. Prefer to shop in store? Coast & Country Vintage can be found in two Victorian locations where you can pop in and browse/purchase in person.
Melbourne Sth Eastern Suburbs :
‘Waverley Antique Bazaar’, Stall B4,
11a Aristoc Rd,
Glen Waverley, (just 2 minutes off the Monash via either Blackburn Rd or Ferntree Gully/Springvale Rd
PLUS
‘Cowes Bazaar & Gallery’, Stall 18,
158 Thompson Avenue,
Cowes, Phillip Island, Victoria.
Regular Milk Paint classes are run through the Waverley space. Send me an inquiry!

Orange Pine Be Gone!- A Milk Paint Makeover
December 9, 2015


I love the way you’ve done these, Hayley.
When I do raised stencilling, it’s with chalk paint… is that reasonably close to the idea you are using here?
Bev these are done using the Fusion Sandstone Texture which dries hard and keeps it’s form. Paint would be too flat.
Great work Hayley! These turned out beautiful!